Reverse Otoplasty with Dr. John Hilinski: Correcting Overly Pinned Ears in San Diego
While traditional otoplasty aims to pin the ears closer to the head to reduce prominence, reverse otoplasty does the opposite–it repositions the ears to stick out further from the head. This procedure is often necessary for individuals with congenital ear deformities or those who have undergone an overly aggressive otoplasty, resulting in ears that appear too close to the head.
Dr. John Hilinski, a double board-certified facial plastic surgeon, is a specialist in both otoplasty and reverse otoplasty. His extensive experience ensures that each patient receives personalized care and natural-looking results, restoring balance and symmetry to the face.
Dr. Hilinski, Nicole, and team are absolutely amazing! Dr. Hilinski is very knowledgeable, takes the time to thoroughly explain procedures, and has gone above and beyond with patient care during my procedure and throughout all of my follow-ups.
What is Reverse Otoplasty?
Reverse otoplasty, as the name suggests, is the opposite of ear pinning surgery. Instead of bringing the ears closer to the head, the goal of reverse otoplasty is to lateralize the ears–repositioning them so they stick out further from the head. This procedure is necessary for patients with congenital ear deformities where the ears did not develop properly, or for individuals whose previous otoplasty was over-corrected, causing the ears to appear too tight against the head.
In some cases, reverse otoplasty also addresses complications from previous surgeries, such as the telephone ear deformity, where the ear has an unnatural curvature resembling the shape of an old-fashioned telephone handset.
Why is Reverse Otoplasty Necessary?
Reverse otoplasty is often needed in two primary cases:
Congenital Ear Deformities
Some patients are born with underdeveloped ear cartilage, causing the upper portion of the ear to appear too close to the side of the head. This results in an abnormal ear shape that can affect overall facial symmetry.
Over-Corrected Otoplasty
Patients who have undergone ear pinning surgery may find that their ears were pinned too closely to the head. This can occur when too much cartilage was removed or the sutures were placed too tightly during the original surgery, leading to an unnatural appearance.

How is Reverse Otoplasty Performed?
In reverse otoplasty, the first step is to release the ear from its overly pinned position. This involves surgically mobilizing the ear by freeing up the scar tissue, cartilage, or sutures that are holding the ear too close to the head. In congenital cases, less release is needed, but it is still essential to reposition the cartilage correctly.
Cartilage grafting is often necessary to support the ear in its new position. Grafts act like support beams, helping to hold the ear in place. These grafts can be taken from other parts of the body, such as the ribs, or from tissue-banked sources. The cartilage grafts are strategically placed to give the ear a more natural, balanced appearance.
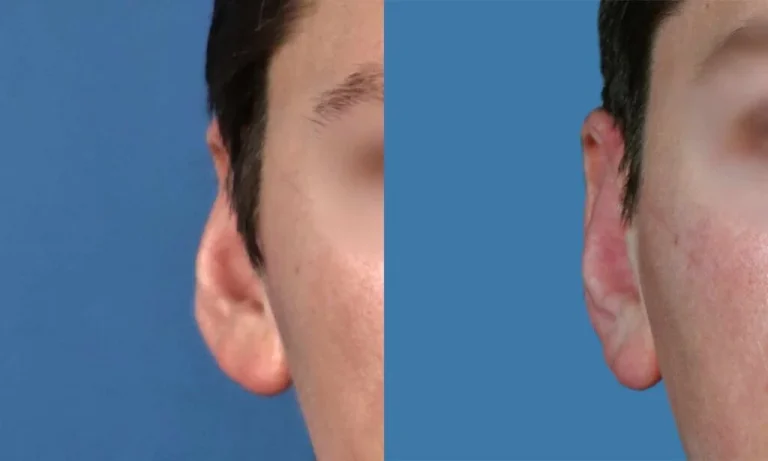
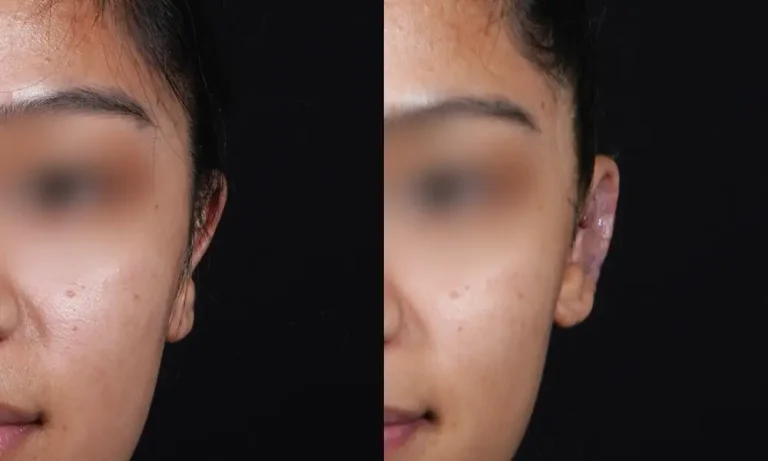
Case 15381
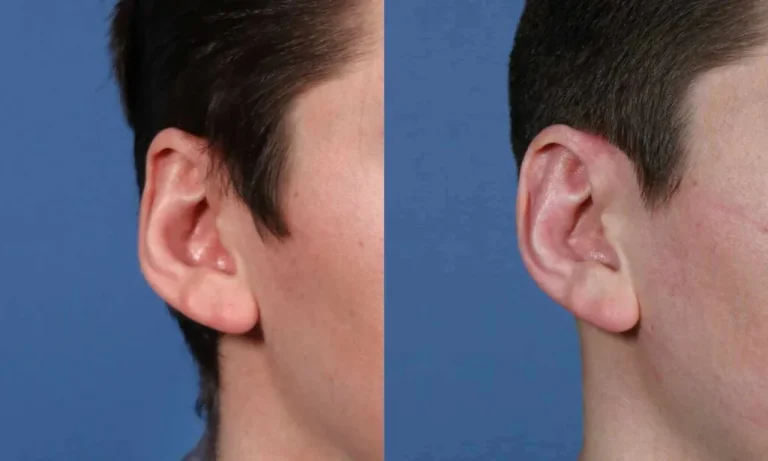
Case 15009

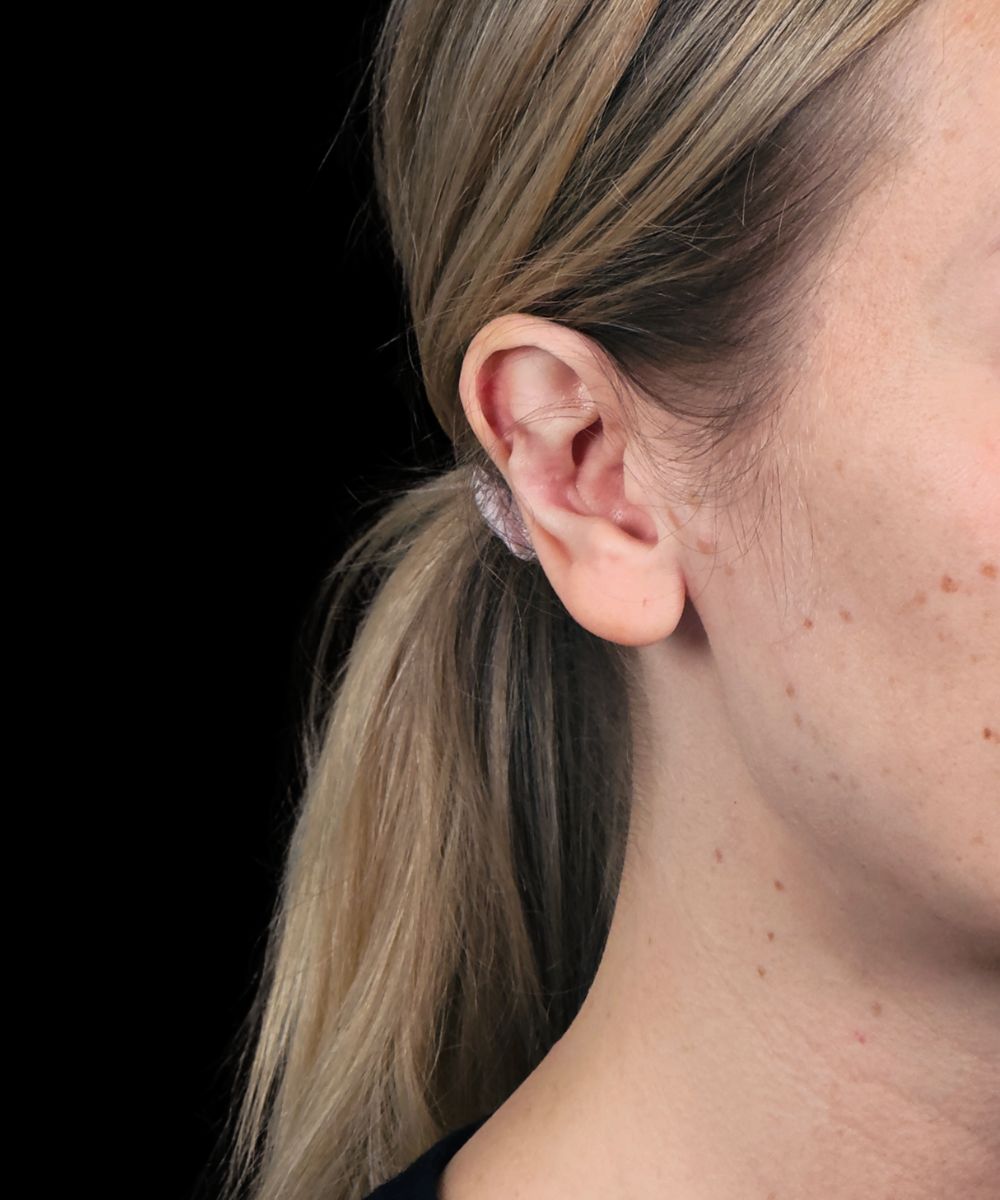
Case 14330

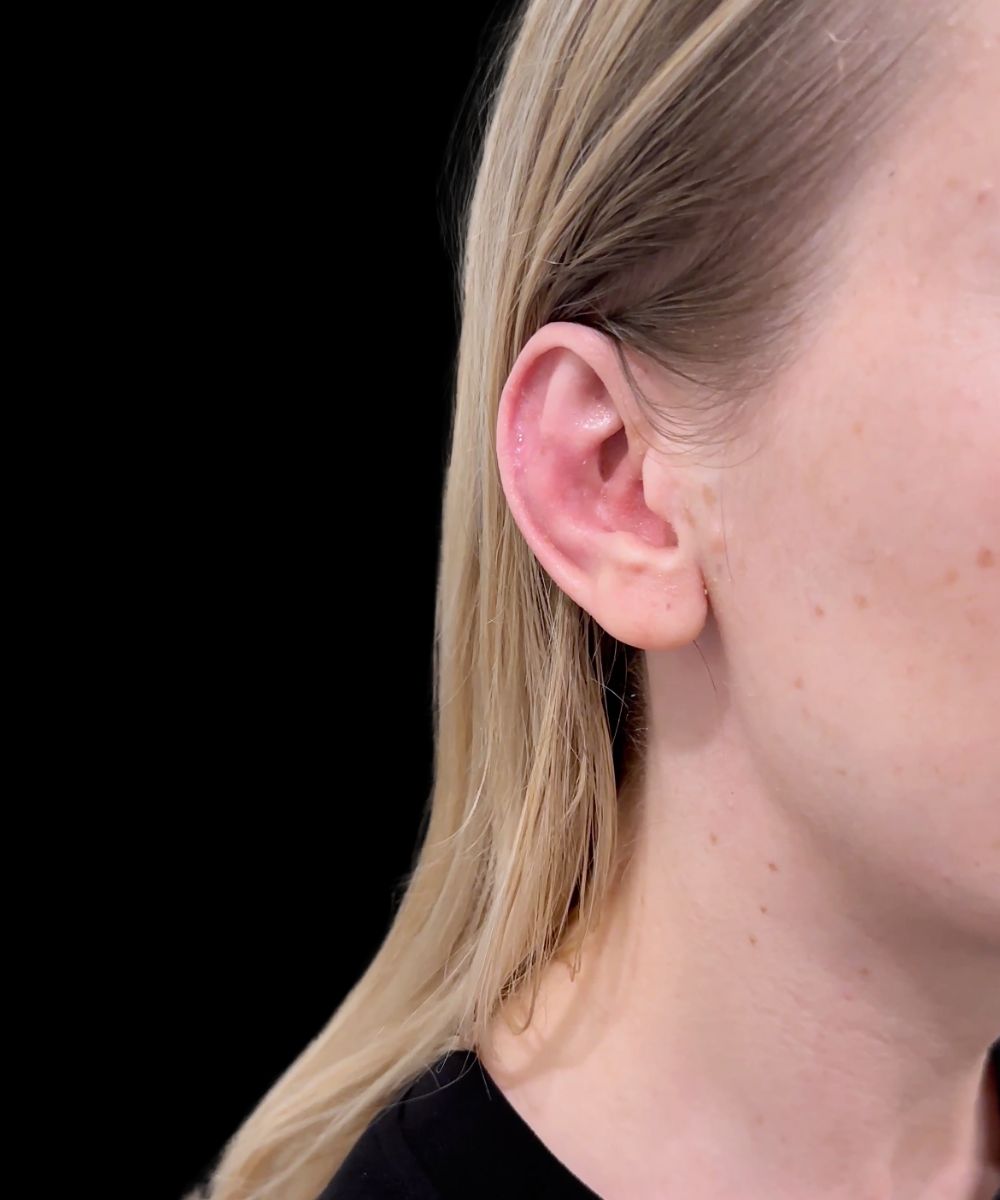
Case 3490
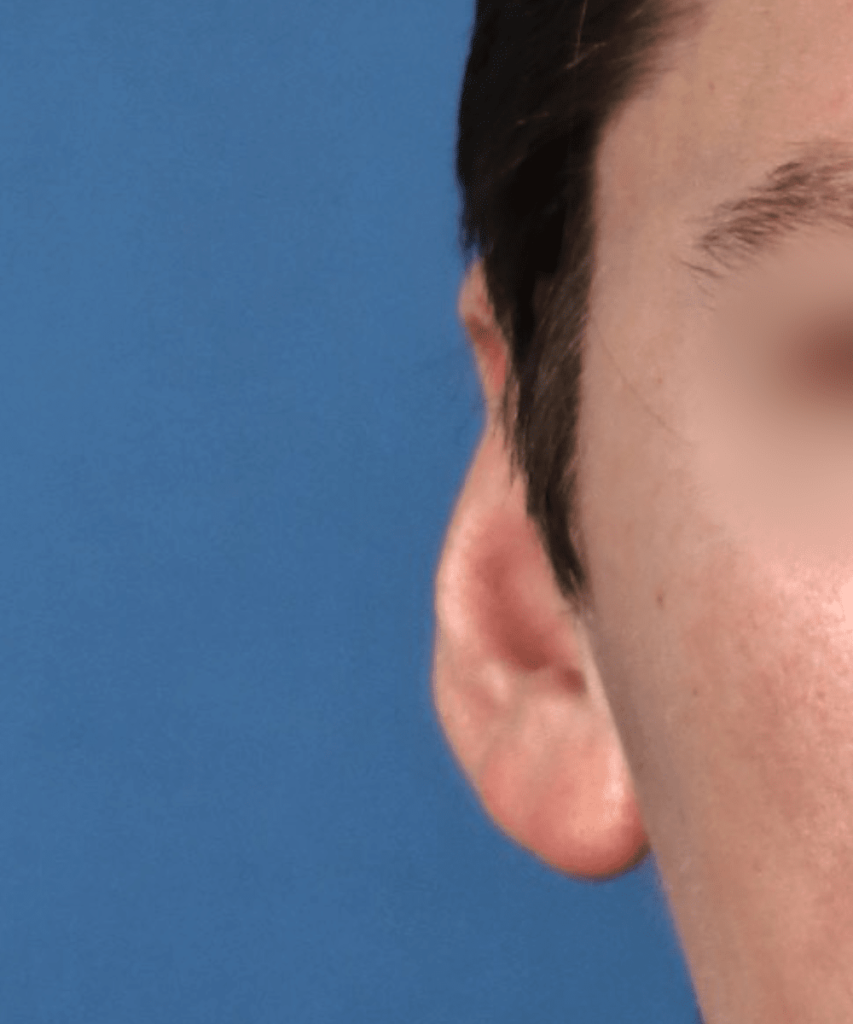
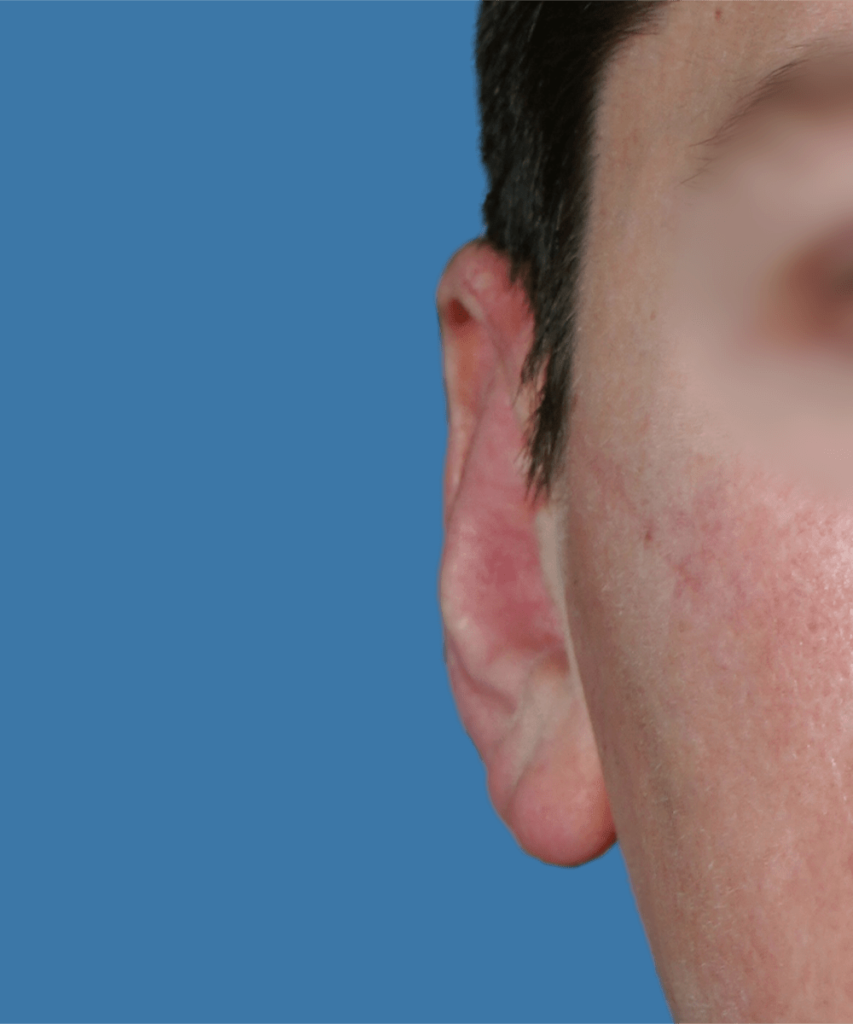
Case 3481


Telephone Ear Correction
One of the complications reverse otoplasty addresses is telephone ear deformity, a condition where the ear develops an unnatural inward curve in the middle, resembling an old telephone handset. This deformity often results from a previous otoplasty where the central portion of the ear was over-pinned. Dr. Hilinski can correct this condition using cartilage grafts and other techniques to restore a more vertical, natural ear shape.
FAQ: Reverse Otoplasty
Reverse otoplasty is needed when the ears are positioned too close to the head, either due to congenital deformities or an over-correction from previous otoplasty surgery.
While traditional otoplasty pins the ears closer to the head, reverse otoplasty repositions the ears outward, away from the head, to achieve a more natural appearance.
In most cases, cartilage grafting is necessary to provide structural support and hold the ear in its new position. Dr. Hilinski uses cartilage from other parts of the body or tissue-banked sources to achieve the best results.
Yes, reverse otoplasty can correct telephone ear deformity, a condition where the central portion of the ear curves inward. Dr. Hilinski uses cartilage grafting and reshaping techniques to restore a more natural ear shape.
Most patients can return to normal activities within 1-2 weeks, but full recovery may take several months as the ear continues to heal and settle into its new position.
No, reverse otoplasty does not affect hearing. The procedure focuses on the external structure of the ear and does not interfere with the ear’s functional components.
Yes, reverse otoplasty can be combined with other ear surgeries, such as earlobe reshaping or correction of other ear deformities, depending on the patient’s needs.

Why Choose Dr. John Hilinski for Reverse Otoplasty?
Dr. John Hilinski is a leading facial plastic surgeon in San Diego, specializing in ear reconstruction surgeries like reverse otoplasty. He has successfully treated patients with congenital ear deformities and complications from prior otoplasty surgeries, offering personalized treatment plans to meet each patient’s unique needs. With a background in advanced ear surgeries and reconstructive techniques, Dr. Hilinski ensures that each patient achieves balanced, natural-looking results.
Schedule a Consultation with Dr. Hilinski
If you’re seeking to correct ears that are positioned too closely to the head, whether from a congenital deformity or a previous over-correction, schedule a consultation with Dr. John Hilinski, San Diego’s leading ear surgery specialist. With his expertise in reverse otoplasty, Dr. Hilinski can help you achieve a more balanced and natural ear appearance. Contact us today to learn more about your options for ear correction.