In many cases following rhinoplasty and revision rhinoplasty it is recommended that patients begin taping their nose. The primary reason to tape the nose is to encourage the skin to shrink wrap down on to the underlying bone and cartilage. This is particularly helpful in rhinoplasty and revision rhinoplasty patients who have medium to moderately thick skin. These patients have skin that takes longer than average to shrink down following surgery. Their skin is also more prone to forming denser scar tissue between the bone/cartilage skeletal structure and the skin. If this occurs before the skin actually shrink wraps down, unwanted excess scar tissue will be laid down and inhibit any further shrink wrapping. In some cases, the unwanted scar tissue will contribute to development of prominent contours and bumps that can distract from the final rhinoplasty result. Taping the nasal skin can minimize the likelihood of these undesirable occurrences.
I will usually recommend that my rhinoplasty and revision rhinoplasty patients begin taping 2-3 weeks following surgery. There are cases, however, when I will wait longer before recommending patients begin taping the nose. Once started, it is best to continue taping for several months in order to gain maximal benefit from this exercise. Patients are recommended to tape the nose prior to going to bed every night. The tape can then be removed in the morning before starting your normal daily routine. If you are able to keep the tape on the nose longer than just overnight, all the better.
Make sure you clarify with your rhinoplasty or revision rhinoplasty surgeon that taping the nose is, indeed, indicated in your case. In addition, your rhinoplasty surgeon should direct you specifically on his or her desired technique for taping the nose.
Choice of Tape
Using one of my own San Diego revision rhinoplasty patients as an example, I have outlined and explained the general steps involved with taping the nose.
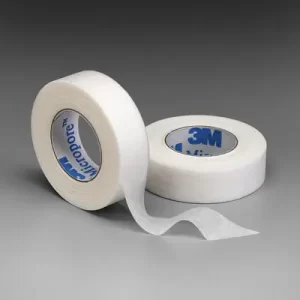
In terms of choice of tape, I now recommend that patients get a roll of 1/2 inch medical grade paper tape at your local pharmacy. In my office, I happen to use a micropore paper tape made by 3M that is hypoallergenic and gentle on the nasal skin when used repeatedly. In addition, this type of paper tape is relatively inexpensive. I have found that 1/2 inch tape is much better for our purpose compared with tape that is thinner or wider.
Clean Your Skin
Prior to applying the tape, make sure to clean the skin over your nose and cheeks thoroughly with an alcohol pad. This helps to remove all oils, grease and make-up that would, otherwise, inhibit the tape from sticking properly.
Application of Tape
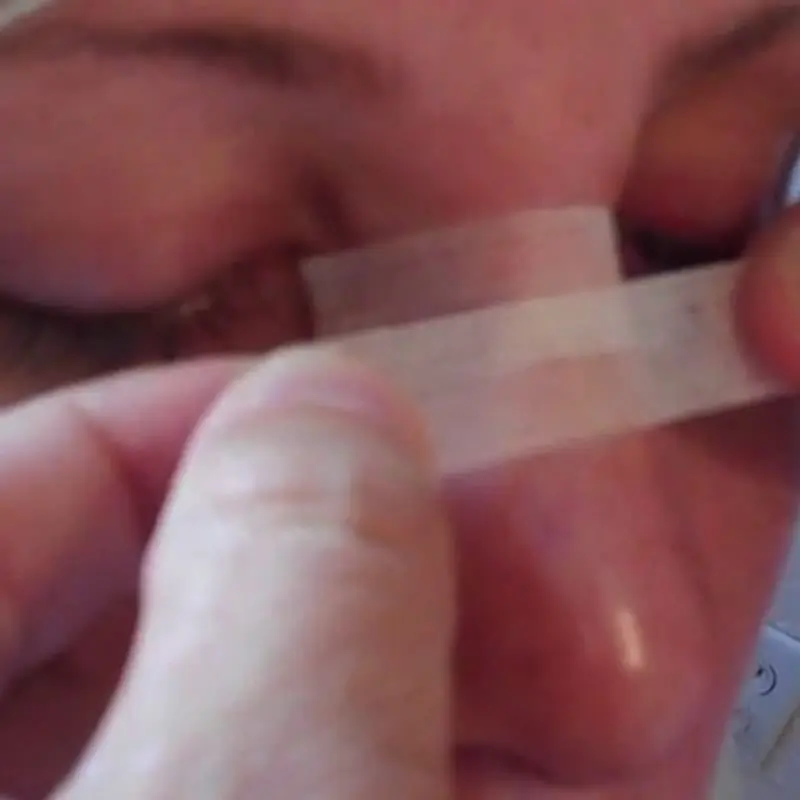
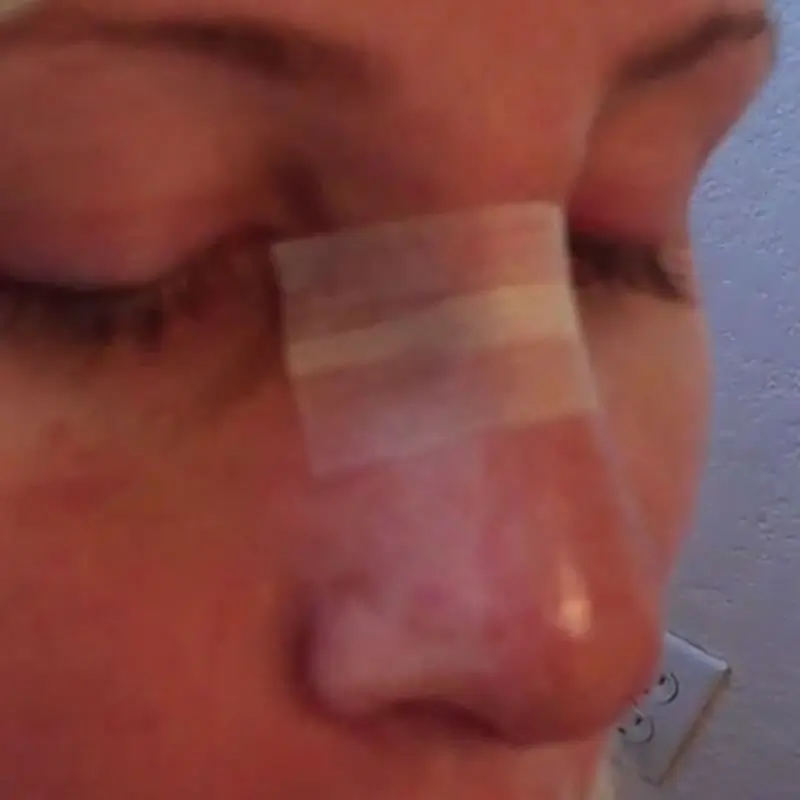
I recommend patients perform the nasal taping while in front of a mirror to ensure proper placement. The adjacent photo diagram is one of my San Diego revision rhinoplasty patients who had a primary rhinoplasty performed by a different plastic surgeon. I performed a revision rhinoplasty to reduce her upper bridge height further (as well as further tip reshaping). Going into her revision procedure we both knew that postoperative management of her skin was going to be part of the process. In this particular case, we are trying to tape just the upper bridge skin. But you can use this same technique even if you are taping lower down on the bridge near the nasal tip. When you begin the actual taping process, cut the piece of tape to be sufficiently long so that it can drape over the nose and extend onto the cheeks on each side. You will have to adjust the length of the each piece of tape as you go up or down along the bridge since the lower bridge near the tip is obviously wider. As you can see in the adjacent photo you want to stretch the piece of tape out maximally as you position it over the nose. Bring the tape down to contact the nose but do not attach the sides of the tape yet. Make sure you pull the tape very tightly on the skin and then attach the sides down to the cheek. Keep in mind the whole idea is to compress the skin down onto the underlying bone and cartilage. Once the first piece of tape is securely placed, you can start going down (or up) the nasal bridge with more pieces. Make sure to overlap the tape by 30-50% with each new strip as shown in the diagram. Once completed, the tape should look like the third photo below with a nice flush fitting over the skin. In fact, it should appear that the tape is tightly fitted and truly compressing the skin down.

Removal of Tape

Removing the tape must be done very carefully. You cannot simply grab the end of the tape and just pull it off the nose. This would defeat the purpose of taping exercises, which is to encourage the skin to adhere further to the nose. In the adjacent photos I show you how to remove the tape with proper technique. It helps if you can apply an over-the-counter adhesive removal solution that aids in loosening the tape from the skin. Alternatively, you can remove the tape while in a hot shower with lots of soap and lather having been applied to the nose. I recommend using a tweezer or equivalent instrument to grasp the edge of the tape as shown in the adjacent photos. Gently peel the tape off the skin but immediately try and pull the tape back over itself 180 degrees. Maintain this orientation as you remove the rest of the tape so you are essentially pulling the tape off parallel to the skin surface. This helps to minimize any chances of you pulling the skin up and off the underlying cartilage and bone.
Repeat this process on a daily basis until your rhinoplasty surgeon directs you to stop. If done consistently and correctly, taping the nose following rhinoplasty and revision rhinoplasty can significantly improve your final surgical outcome.